
MD-12 Configuration
The MD-12 Setup app is available for Windows, Linux and Raspberry Pi. Links are on the Downloads page. The configuration app is a standalone application and does not require any special installation. Just unzip into a folder of your choice. It is not recommended to place it on the desktop.
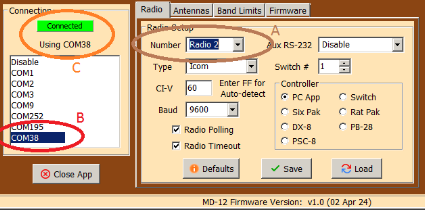
Step 1 - Connecting to the MD12The MD-12 may be configured via the ShackLAN network or a direct USB connection. Before connecting the the MD-12 you must know the current radio number [A] set in the MD-12. New units will be set to Radio 1. if configuring via a direct USB connection, connect a USB cable to the MD-12 and a new COM port should appear in the list [B]. Click on the new port number to initiate the connection. This may take a few seconds as the app searches for the correct baud rate. Be sure you get the note that the app has opened the COM port successfully [C]. The status light will turn green indicating a successful connection. |
 |
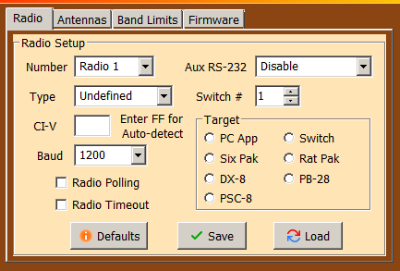
Step 2 - Set up the radio 1 - Set the Radio Number to the desired number. NOTE:
Two decoders cannot share the same radio number as conflicts
result. |
 |
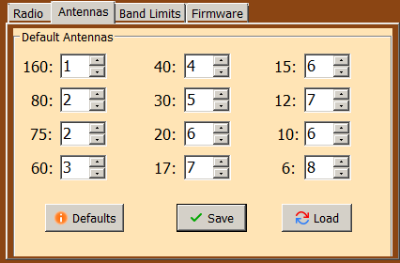
Step 3 - Antenna assignmentsThe last required step in configuring your MD-12 is to assign a default antenna to each band. Click on the Antennas tab to see the assignments. Select the desired antenna number for each band. NOTE: RatPak and SixPak users should not select antennas 7 or 8. Click on the Save button to write the configuration the to MD-12. |
 |
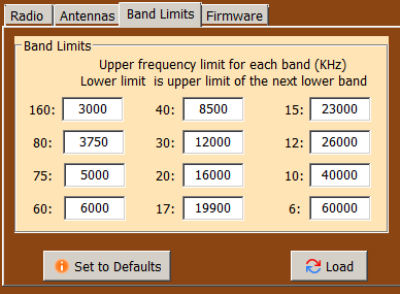
Band limits - OptionalThe MD-12 also provides the ability to define your own band segments. Most users will not need to change these from the default values. The only one you may wish to change is the 80M one to move the divide between 80M and 75M. Changing a segment limit is as simple as clicking on the one to change and entering the new value. Remember that all frequencies are in KHz. No decimal points. |
 |